Memaparkan catatan dengan label konfigurasi. Papar semua catatan

Selasa, 26 Januari 2010

How to change font and spacing as a default in office 2007

Follow below steps;

1. Open new document.

2. In font group, change your Font and size. Then click small icon on right below corner.


3. Click Default.


4. Click Yes when you receive the following message:

Do you want to change the default font to font name?
This change will affect all new documents based on the NORMAL template.

5. Click OK.

6. Go to Page Layout tab, and change spacing in paragraph group. Then click small icon on right below corner.


7. Click default and yes to save.


and done!


Bacteria comment: no need to change setting everytime u open new docs.

Selasa, 8 Disember 2009

Disable services to optimize your windows XP

If you feel that your machine so lazy, u now can reduce their working jobs. follow below step and it might get your machine faster 15-35%

1. Go to start, run and type services.msc

2. You can see like picture below,


3. Now all you need to do is to disable un-needed services.

4. Change Startup Type for Alerter service by double-clicking Alerter, selecting Disabled from Startup type dropdown box, and clicking OK button.


5. Now disable the following services using the same technique:

a. Automatic Updates
b. Background Intelligent Transfer Service
c. ClipBook
d. Computer Browser (if you have a standalone pc – no network)
e. Error Reporting Service
f. Fast User Switching Compatibility
g. Help and Support (switch to Manual)
h. Indexing Service
i. Messenger
j. NetMeeting Remote Desktop Sharing
k. Performance Logs and Alerts
l. QoS RSVP
m. Remote Desktop Help Session Manager
n. Remote Registry
o. Server (if you have a standalone pc – no network)
p. Telnet
q. Themes
r. Upload Manager
s. WebClient
t. Wireless Zero Configuration (don’t disable if using wireless network/Internet connection)

6. Close Computer Management window.

7. Restart computer.

Other source to optimize your machine, click here.

Bacteria comment: good for your almost dead ps's.. :D

Isnin, 19 Januari 2009

How to move outlook .ost file to other drive

in certain reason, some user want to save their outlook .ost (offline) to other folder or drive. in default setting, these file is store in C:\Documents and Settings\user\Local Settings\Application Data\Microsoft\Outlook\outlook.ost and its quit long path and hidden too.

for some software like Deep Freeze (will elibrate later), these file need to transfer in other partition (thawed drive) to make changes. if not it will be feeze out.

the step is like below:

1. First you need to close your Outlook.

2. Click Start, and then click Control Panel.

3. Double-click Mail, and then click E-mail Accounts.

4. Click View or change existing e-mail accounts, and then click Next.

5. Select the Microsoft Exchange Server account, and then click Change.

6. Clear the Use Cached Exchange Mode check box.

7. Click More Settings.

8. Click the Advanced tab.

9. Click Offline Folder File Settings.

10. Click Disable Offline Use, and then click Yes in the dialog box that appears.

11. Click Offline Folder File Settings.

12. Click Browse, go to the location where you want to save your .ost file, and then click Open.

13. Click OK.

14. Select the Use Cached Exchange Mode check box.

15. Click Next, and then click Finish.


bacteria comment: im trying deep freeze now, and seem it work for transferring data to thawed drive..

Jumaat, 19 September 2008

netsh for Vista

Make sure the UAC is disable.

--- set DHCP to wireless interface named “Wireless Network Connection” ---
netsh interface ipv4 set address name="Wireless Network Connection" dhcp
netsh interface ipv4 set dnsserver "Wireless Network Connection" dhcp

--- set DHCP to wired interface named “Local Area Connection” ---
netsh interface ipv4 set address name="Local Area Connection" dhcp
netsh interface ipv4 set dnsserver "Local Area Connection" dhcp

--- set IP, DNS & WINS to wireless interface named “Wireless Network Connection” ---
netsh interface ipv4 set address name="Wireless Network Connection" static 172.16.100.122 255.255.255.0 172.16.100.1
netsh interface ipv4 set dnsserver "Wireless Network Connection" static 172.16.10.2
netsh interface ipv4 add dnsserver "Wireless Network Connection" 172.16.10.4 index=2
netsh interface ipv4 set winsserver "Wireless Network Connection" static 172.16.10.2
netsh interface ipv4 add winsserver "Wireless Network Connection" 172.16.10.4 index=2

komen bacteria: to many parameters compare to XP

Jumaat, 12 September 2008

netsh untuk network anda - WinXP

fungsi netsh digunakan bagi mereka yang kerap menukar ip address terutama mesin bergerak (notebook). ini kerana mereka tidak akan berada di satu-satu tempat yang tetap yang mempunyai environment network yang berbeza-beza. kebanyakan di pejabat menggunakan IP statik dan apabila mereka di luar (coffie shop), penggunaa wifi pula digunakan. bergitu lah keadaannya apabila berada di branch ofis yang lain. user terpaksa menggunakan cara manual yang berkemungkinan kesalahan mengisi alamat IP terjadi atau mereka terlupa.

Windows mempunyai penjanaan mengisi alamat IP ini secara automatik. dengan penggunaan batch file, netsh boleh digerakkan.

sila ikuti cara-caranya.

1. pastikan alamat IP tersedia didalam network connection setting


2. pergi ke start, run dan taip CMD. kotak command prompt akan keluar
3. pastikan root adalah c:\ dan kemudia taip netsh -c interface dump > c:/mynetwork.txt. anda boleh menukar apa jua nama yang anda suka pada mynetwork.txt


4. anda boleh lihat fail mynetwork.txt didalam root c:\


5. seterusnya anda perlu membuka notepad. pergi ke start, run dan taip notepad.
6. sila taip:

@echo off
echo sila tunggu sebentar. windows sedang mengkonfigurasi network anda.

%windir%\system32\netsh.exe -f c:\mynetwork.txt

echo proses tamat. selamat surfing!
pause
exit


7. kemudian save as. pastikan save as type dipilih all files dan filename diisi *.bat


8. seterusnya lihat root c:\ dan anda akan lihat fail *.bat. dalam kondisi ini bacteria menamakan VLAN40.bat


9. right click pada fail *.bat itu dan create shortcut. hantar ke desktop.
10. right click shortcut terbabit dan tekan propertis. change icon bagi memberikan icon yang anda suka.
11.setelah selesai,double click icon untuk run program.


12. tunggu sehingga selesai.
13. ulangi langkah 1 hingga 10 bagi mereka yang mempunyai alamat IP yang berbeza-beza.


komen bacteria: sangat menjimatkan masa dan tak perlu pening kepala.

Selasa, 9 September 2008

modem on Blackberry

good news for blackberry users. now u dont have to use USB broadband to install on ur laptop. just install the blackberry software and a little setup for surfing on the net. just follow these step below.

**This setting also works on handphone that support 3G connection n internet enabled. because the modem is bulid in together. all u need is install the software startup first to ensure the modem driver is install (i have try on sony ericson hp and its works!!)**
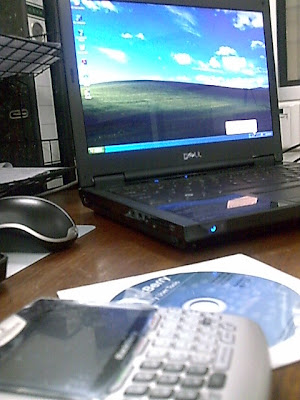


Dial-up setting & configuration using Blackberry 8707G with Celcom on Windows XP Professional.

Requirements:-
• Blackberry Desktop Software 4.2 must be installed. Follow the instructions manual on the installation CD to install the Blackberry Desktop Software.
• Use USB cable to connect Blackberry device to the computer.

Step 1: Install the Blackberry Desktop Software 4.2.

Step 2: Run the Blackberry Desktop Manager.


Step 3: In the Blackberry Desktop Manager, sets the connection type using USB as figure below. To set, go to Options – Connection Settings.


Step 4: Connect the Blackberry Device to the computer. Wait until Windows properly detect & install the driver.

Step 5: Check & verify the connection is working as figure below.


Step 6: Configure modem settings. Go to Control Panel – Phone and Modem Options. Under the Modems tab, select Standard Modem and click Properties.


Step 7: In the Standard Modem Properties windows, select Diagnostics tab then click Query Modem. If you can see query response as shown below, means the modem connectivity is successfully configured.


Step 8: In the Standard Modem Properties, click Advanced. Type at+cgdcont=1,”IP”,”celcom3g” in the Extra initialization commands box. Click OK to save.

Note:
If you have Celcom 3G SIM Card - at+cgdcont=1,”IP”,”celcom3g”
If you have Celcom GPRS SIM Card - at+cgdcont=1,”IP”,”celcom.net.my”
If you have Maxis 3G SIM Card - at+cgdcont=1,”IP”,”unet”
If you have Maxis GPRS SIM Card - at+cgdcont=1,”IP”,”net”


Step 9: Create a dialer. Right-click on the My Network Places then clicks Properties.

Step 10: Click Create New Connection. The New Connection Wizards will open. Follow the setting example below:


The following window will appear after you click Finish. Click Properties.


Select Standard Modem, then click Configure.


Change the Maximum speed to 921600. Click OK two times. Then, click Dial to test the connection.


Configuration and setting up of dial-up internet connection using Blackberry 8707G with Celcom is now completed.

this setting also works on Windows Vista. have a nice day surf!!

komen bacteria: tak perlukan maxis ataupun celcom usb broadband. asalkan credit anda mencukupi. :D